Sample Binder Repositories#
Below we list several sample Binder repositories thatdemonstrate how to compose build files in order to createBinders with varying environments. You can find all of therepositories listed on this page at thebinder-examples GitHub organization.
Managing languages#
Python environment with a requirements.txt#
![]() |
|

A Binder-compatible repo with a requirements.txt file.
Access this Binder at the following URL
https://mybinder.org/v2/gh/binder-examples/requirements/master
Notes#
The requirements.txt file should list all Python libraries that your notebooks
depend on, and they will be installed using:
pip install -r requirements.txt
The base Binder image contains no extra dependencies, so be as explicit as possible in defining the packages that you need. This includes specifying explicit versions wherever possible.
If you do specify strict versions, it is important to do so for all your dependencies, not just direct dependencies. Strictly specifying only some dependencies is a recipe for environments breaking over time.
pip-compile is a handy tool for combining loosely specified dependencies with a fully frozen environment. You write a requirements.in with just the dependencies you need and pip-compile will generate a requirements.txt with all the strict packages and versions that would come from installing that package right now. That way, you only need to specify what you actually know you need, but you also get a snapshot of your environment.
In this example we include the library seaborn which will be installed in
the environment, and our notebook uses it to plot a figure.
Files in this repository#
.github
index.ipynb
requirements.in
requirements.txt
runtime.txt
Conda environment with environment.yml#
![]() |
|

A Binder-compatible repo with an environment.yml file.
Access this Binder by clicking the blue badge above or at the following URL:
https://mybinder.org/v2/gh/binder-examples/conda_environment/master?filepath=index.ipynb
Notes#
The environment.yml file should list all Python libraries on which your notebooks
depend, specified as though they were created using the following conda commands:
conda activate example-environment
conda env export --from-history -f environment.yml
Note that the only libraries available to you will be the ones specified in
the environment.yml, so be sure to include everything that you need!
Also note that if you skip the --from-history, conda may include OS-specific
packages in environment.yml, which you would have to manually prune from
environment.yml. For example, confirmed macOS-specific packages that should
be removed are:
libcxxabi=4.0.1
appnope=0.1.0
libgfortran=3.0.1
libcxx=4.0.1
Files in this repository#
.github
environment.yml
index.ipynb
python package with setup.py#
![]() |
|

A Binder-compatible repo with a python package and a setup.py file.
Notes#
It is convenient to provide an example Jupyter notebook for a new package and add the hooks necessary to run the example with Binder. However, normally the package will not be included in the python path. To do that, one needs a setup.py for the package (see binder docs). Once this is done, it is possible to import the package in a notebook running within Binder.
This setup.py was originally adapted from kennethreitz/setup.py by @cranmer
Files in this repository#
MANIFEST.in
example_notebook
mypackage
setup.py
Julia and Python environments#
![]() |
|

This example shows how you can install a Julia and Python environment side-by-side.
In this repository are both an environment.yml file as well as a REQUIRE file.
The former corresponds to an anaconda python environment, and the latter corresponds
to a Julia environment. Both kernels will be available to you in a built Binder
environment.
Files in this repository#
REQUIRE
environment.yml
julia.ipynb
python-and-julia.ipynb
python.ipynb
Julia Binder demo#
This is a demo of Julia functionality for the Binder project. Simply go to the URL below and it will launch an interactive Julia environment:
![]() |
|

Files in this repository#
Manifest.toml
Project.toml
demo.ipynb
Specifying an R environment with a runtime.txt file#
Jupyter+R: ![]()
RStudio: ![]()
RShiny: ![]()
Binder supports using R and RStudio, with libraries pinned to a specific snapshot on MRAN.
Note: Another alternative is to use the holepunch package for R.
Requirements and suggestions#
You need to have a runtime.txt file that is formatted like:
r-<YYYY>-<MM>-<DD>
where YYYY-MM-DD is a snapshot at MRAN that will be used for installing
libraries. In this line, you can request a specific
version of R. To do this list the version between the ‘r’
and the year, as in r-3.6-2019-09-24. Right now the default version of R is 3.6.
We recommend using https://github.com/binder-examples/r-conda for faster installs than using a
install.R
To install R libraries (or packages) you can add an install.R file that specifies one library to install per line.
Both RStudio and IRKernel are installed by default, so you can use either the Jupyter notebook interface or the RStudio interface.
This repository also contains an example of a Shiny app.
URL addresses for RStudio and Shiny environments#
The Binder repository can be used to allow anyone to access an RStudio environment containing our code and data right in their web browser. It also allows hosting a Shiny app. For those purposes, we have to append a bit of text to the URL of our Binder repository, which we can find out at mybinder.org when we enter the URL of our original repository from GitHub or Figshare, etc.
For the RStudio environment, we must add the following at the end of the URL:
?urlpath=rstudioExample: https://mybinder.org/v2/gh/binder-examples/r/master?urlpath=rstudio
For the Shiny app environment, we must add the following at the end of the URL:
?urlpath=shiny. In this case, we also have to note that if the Shiny app files are located in a folder, this folder should be specified in the URL, after a slash. We would then also have to put in a trailing slash at the end of the URL, and to avoid spaces in the name of the repository, placing instead a hyphen (the reason is that spaces are converted to%20).Example: https://mybinder.org/v2/gh/binder-examples/r/master?urlpath=shiny/bus-dashboard/
Files in this repository#
.github
bus-dashboard
index.ipynb
install.R
runtime.txt
Specifying an R environment by having a DESCRIPTION file#
Jupyter+R: ![]()
RStudio: ![]()
Binder supports using R and RStudio, with libraries pinned to a specific snapshot on MRAN.
If you specify a runtime.txt file that is formatted like:
r-<YYYY>-<MM>-<DD>
where YYYY-MM-DD it will use the MRAN snapshot of that day for setting up the R runtime.
Without specifying a runtime.txt it will use a 2-day old snapshot of MRAN.
Both RStudio and IRKernel are installed by default, so you can use either the Jupyter notebook interface or the RStudio interface.
Files in this repository#
DESCRIPTION
NAMESPACE
R
test-library.ipynb
Octave on mybinder.org#
![]() |
|

An example of using Octave on mybinder.org.
This shows you how to make Matlab code that works with Octave run on mybinder.org.
The example notebook is taken from the octave_kernel repository.
Files in this repository#
apt.txt
environment.yml
index.ipynb
User interfaces#
JupyterLab + Binder#
![]() |
|

JupyterLab is the default UI on Binder.
Create a Binder link that points to a file in JupyterLab#
You can also create a Binder link that points to a specific file in JupyterLab by adding the following to the end of your link:
?filepath=path/to/my/notebook.ipynb
For example, the Binder badge above goes to the following URL:
https://mybinder.org/v2/gh/binder-examples/jupyterlab/HEAD?filepath=/index.ipynb
Note: this repository also installs several JupyterLab extensions via a postBuild script, allowing
you to use JupyterLab’s extensions and widgets functionality.
For a more complete demo of JupyterLab using Binder, see the JupyterLab Demo.
Classic notebook interface on Binder#
![]() |
|
JupyterLab is the default UI on Binder, but the classic notebook is available, too. In order to run a JupyterLab session, you have two options:
Start classic notebook after you start your Binder#
Do the following:
Launch a Binder instance (e.g., by clicking the Binder badge)
Replace
labat the end of your URL withtree.That’s it!
Create a Binder link that points to the classic notebook interface#
You can also create a Binder link that points to the classic notebook landing page by adding the following to the end of your link:
?urlpath=/tree/
You can point to a specific file or directory using the classic notebook interface by including a path
beginning with /tree/ to the end of urlpath, like so:
?urlpath=/tree/path/to/my/notebook.ipynb
For example, the Binder badge above goes to the following URL:
https://mybinder.org/v2/gh/binder-examples/requirements/HEAD?urlpath=/tree/index.ipynb
Note: this repository also installs several JupyterLab extensions via a postBuild script, allowing
you to use JupyterLab’s extensions and widgets functionality.
For a more complete demo of JupyterLab using Binder, see the JupyterLab Demo.
Files in this repository#
.profile
binder
geojson-extension.geojson
index.ipynb
Enabling Jupyter Extensions with post-build commands#
![]() (Jupyter Notebook) |
(Jupyter Notebook) |

![]() (Jupyter Lab) |
(Jupyter Lab) |
This example demonstrates how to enable Jupyter extensions with Binder.We currently only cover one example in this repo. Be aware that some are idiosyncratic in how they’re enabled.
We accomplish each step using a requirements.txt file to install the extension,
then a postBuild file to enable it.
ipywidgets#
Ipywidgets lets you create interactive widgets in your notebook. Installation is fairly straightforward. You install the python package, then enable the extension.
The postBuild file defines commands (one per line) to be run with bash. In this case, we first enable the ipywidgets extension in the classic notebook interface. We then use it to install a Jupyter Lab extension (by calling jupyter labextension) which allows ipywidgets to be displayed within notebooks.
Files in this repository#
index.ipynb
postBuild
requirements.txt
Creating interactive presentations on Binder with RISE#
![]() |
|

RISE allows you to quickly generate a live, interactive presentation from a Jupyter Notebook that is connected to the underlying Kernel of the notebook. Using a new feature for automatically launching the RISE plugin when a notebook is opened, RISE can be used to share interactive presentations that run in the cloud with Binder. This repository demonstrates how to accomplish this.
To make your RISE presentation automatically-launch with it is open,
add an autolaunch=true configuration
parameter to a notebook’s livereveal section in the
metadata. E.g.:
...
"livereveal": {
        "autolaunch": true
        }
...
When the notebook is launched, your presentation will automatically begin.
See the RISE Documentation for more information.
Files in this repository#
environment.yml
index.ipynb
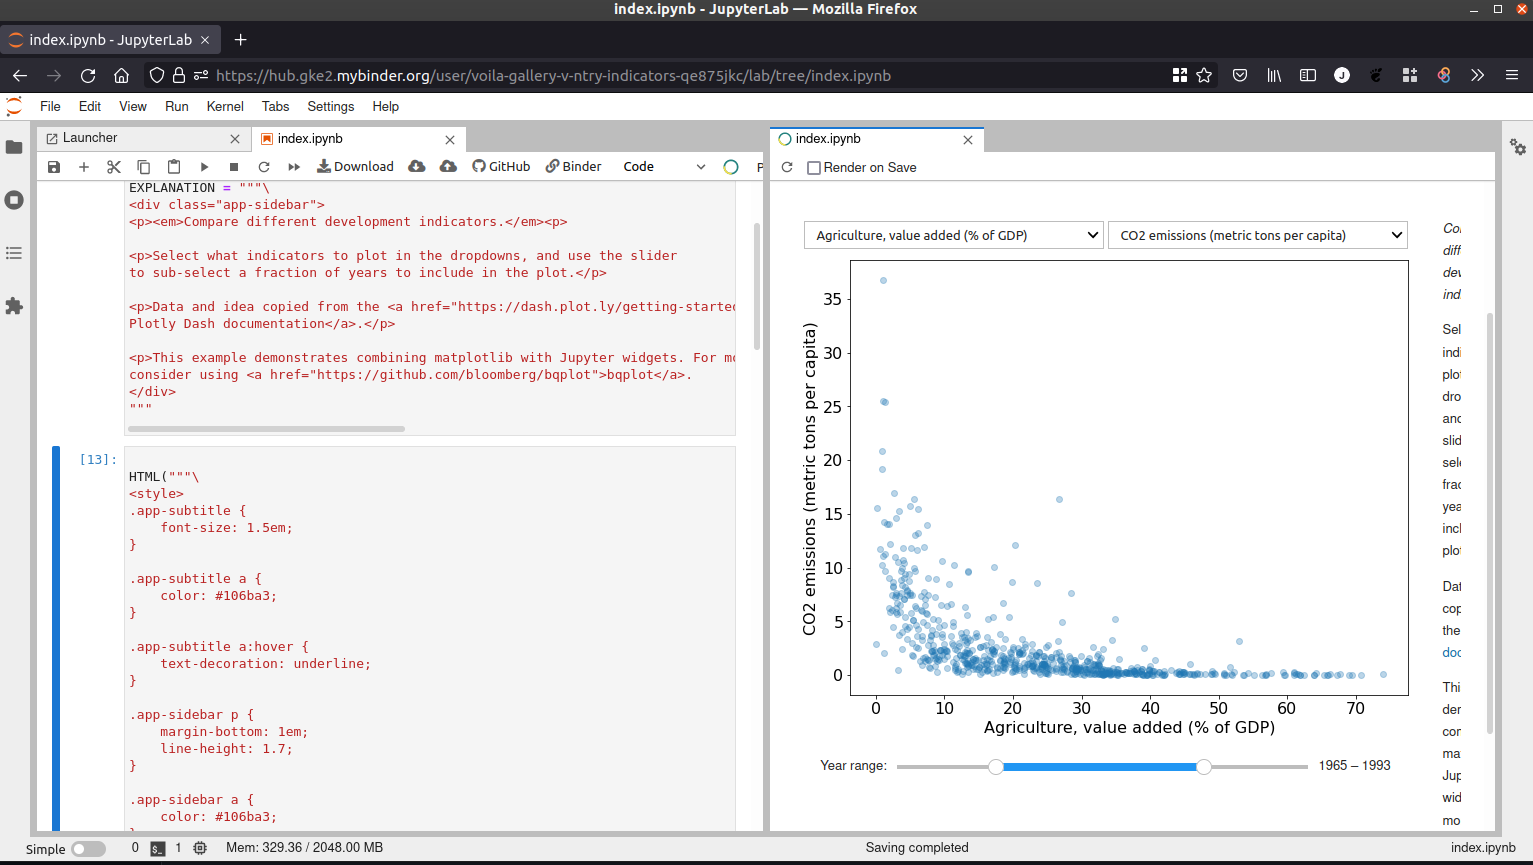
Interactive dashboard from notebook with Voilà#
Voilà |
JupyterLab |
|---|---|
|
|
This example demonstrates how to use Voilà on Binder.

Configuration#
If you would like to use the same configuration as this repository but for another project, check out the following steps:
Make sure the repository is publicly available (on GitHub, Gitlab or as a GitHub Gist
Define the dependencies in
environment.yml.requirements.txtis also supported. In the dependency file, addvoila.Go to mybinder.org and enter the URL of the repository.
In
Path to a notebook file, selectURLand use the Voilà endpoint:voila/render/path/to/notebook.ipynbClick
Launch.Binder will trigger a new build if this is the first launch (or if there have been new changes since the last build). This might take a few minutes to complete. If an image is already available, the server will be able to start within a few seconds.
Here is an overview of the Binder configuration on mybinder.org:

For more details, check out the Voilà documentation on https://voila.readthedocs.io/en/latest/deploy.html#deployment-on-binder
JupyterLab Preview Extension for Voilà#
The JupyterLab Preview Extension for Voilà should normally be automatically available, since Binder now defaults to JupyterLab 3.0.
For consistency, you can add jupyterlab=3 as a dependency in environment.yml.
Files in this repository#
environment.yml
index.ipynb
Interactive apps from Jupyter Notebooks#
![]() |
|

This repository demonstrates how to create interactive webapps from a Jupyter Notebook. This is similar to how Shiny apps work in R.
Using the appmode Jupyter plugin, a notebook’s code will be run, and then only the markdown cells and
code outputs will be shown.
You can check out the appmode repository here: https://github.com/oschuett/appmode
Files in this repository#
environment.yml
index.ipynb
ipyvolume_demo.ipynb
postBuild
Running a bokeh server with Binder#
![]() |
|

This repository demonstrates how to run a Bokeh server from within Binder. To do so, we did the following things:
Created a
bokeh-appdirectory in the repo with amain.pyfile in it. This is the application that will be served. We’ve added the Bokeh weather example as a demo.Installed
bokehfor the viz andjupyter_server_proxywhich we’ll use to direct people to the port on which Bokeh runs. Seeenvironment.yml.Added a custom server extension (
bokehserverextension.py) that will be run to direct people to the Bokeh app (which is run on a port)Used
postBuildto enable thejupyter_server_proxyextension, then set up and enable our custom server extension for Bokeh.Created a Binder link that uses
urlpathto point users to the port on which the Bokeh server will run:https://mybinder.org/v2/gh/binder-examples/bokeh/master?urlpath=/proxy/5006/bokeh-app
When people click on the Binder link, they should be directed to the running Bokeh app.
Files in this repository#
bokeh-app
bokehserverextension.py
environment.yml
postBuild
stencila-py#
Demo for Stencila & DAR on binder with Python code.
![]() |
|

Learn more about Stencila and its integration with Binder in this blog post.
Files in this repository#
article
System environments#
Specifying a Python 2 environment with runtime.txt#
![]() |
|

We can specify various runtime parameters with a runtime.txt file. In this
repository, we demonstrate how to install python 2 with the environment.
If you specify python-2.7 in runtime.txt, then:
A python3 environment is created & installed (this is what the notebook runs from)
A python2 environment is created and registered
The contents of
requirements.txtare installed into the python2 environment
important: Make sure that you save your notebooks with a python 2 kernel activated, as this defines which kernel Binder will use when a notebook is opened.
note:
If you also wish to install python 3 dependencies, you may do so
by including a file called requirements3.txt. The packages
inside will be installed into the python 3 environment.
Files in this repository#
index.ipynb
requirements.txt
runtime.txt
Mixing Python 2 and 3 kernels with runtime.txt#
![]() |
|

Sometimes you want both Python 2 and Python 3 (e.g., if you have a mixture of notebooks that use each
version of the language). This repository demonstrates how to handle these cases with repo2docker. You can
specify a Python 2.7 environment with the runtime.txt file. In this case, repo2docker will install Python 2
alongside Python 3 (though all commands will default to Python 2). In this case, you can install Python 3 dependencies
with requirements3.txt, while a file called requirements.txt alone will install to the Python 2 environment.
Files in this repository#
index2.ipynb
index3.ipynb
requirements.txt
requirements3.txt
runtime.txt
Using latex with Binder#
![]() |
|

This repository demonstrates how to install latex alongside matplotlib for Binder. This repository also makes use of JupyterLab Latex to render latex files in Jupyter lab. This requires a few different build components:
apt.txtfor apt-installing the latex componentsenvironment.ymlfor installing the python dependenciespostBuildfor forcing matplotlib to build the font cache and for installing JupyterLab Latex.
Thanks to m-weigand for giving inspiration for this repo!
Files in this repository#
apt.txt
environment.yml
images
index.ipynb
postBuild
sample.tex
Installing packages from apt repositories#
![]() |
|

Sometimes you want packages that exist outside of the language-specific packaging
ecosystems of Python/R/Julia. Binder makes it possible to apt-install packages
from the ubuntu apt repository. This repository demonstrates how to do this by specifying
names in an apt.txt file.
Notes#
The apt.txt file should list all packages that your notebooks
depend on, and they will be installed using:
apt-get install --yes --no-install-recommends
The base Binder image contains no extra dependencies, so be as explicit as possible in defining the packages that you need.
In this example we include the tools cowsay and lolcat which will be installed in
the environment, and our notebook uses them to show a colorful message.
Files in this repository#
apt.txt
index.ipynb
postBuild
Multi-language demo.#
This is a demo showing how you can intermingle Python, R, Rust, Fortran, Cython, C.
You can try it :
![]() |
|

And read the accompanying blog post.
Files in this repository#
23-Cross-Language-Integration.ipynb
Manifest.toml
Project.toml
apt.txt
data.csv
environment.yml
julia.ipynb
polyglot-ds-prep.ipynb
polyglot-ds.ipynb
postBuild
Using conda with pip in the same build#
![]() |
|

If you use environment.yml, then Binder will use a Miniconda distribution
to install your packages. However, you may still want to use pip. In
this case, you should not use a requirements.txt file, but instead use
a - pip section in environment.yml. This repository is an example of how
to construct your environment.yml file to accomplish this.
Files in this repository#
environment.yml
index.ipynb
Data and reproducibility#
Remote Storage with Binder#
![]() |
|

A Binder-compatible repo that shows accessing data from remote sources.
Access this Binder at the following URL:
https://mybinder.org/v2/gh/binder-examples/remote_storage/master
Notes#
The notebooks use boto and requests to load both images and tables from S3.
The image loading makes use of PIL and the table loading
makes use of pandas.
Files in this repository#
index.ipynb
requirements.txt
Run this example#
![]() |
|

Pull data into Binder notebooks#
This example uses Quilt to inject data packages into a Jupyter notebook.
Data packages are versioned, immutable snapshots of data. Data packages may contain data of any size. Here is an example of data package: uciml/iris.
How to specify data dependencies in your own Binder#
Add
quilttorequirements.txtSpecify data package dependencies in
quilt.yml(docs). For example:
packages:
  - vgauthier/DynamicPopEstimate   # get the latest version
  - danWebster/sgRNAs:a972d92      # get a specific hash (short hash)
  - akarve/sales:tag:latest        # get a specific tag
  - asah/snli:v:1.0                # get a specific version
Include the following lines at the top of
postBuild. (postBuildshould be executable:chmod +x postBuildon UNIX,git update-index --chmod=+x postBuildfor Windows).
###!/bin/bash
quilt install
If you are adopting the binder folder pattern for your repo2docker configuration files, and including quilt.yml, your postBuild file should look like this:
###!/bin/bash
quilt install @./binder/quilt.yml
Now you can access the package data in your Jupyter notebooks:
In [1]: from quilt.data.akarve import sales
In [2]: sales.transactions()
Out[2]:
      Row ID  Order ID Order Date Order Priority  Order Quantity       Sales  \
0          1         3 2010-10-13            Low               6    261.5400
1         49       293 2012-10-01           High              49  10123.0200
2         50       293 2012-10-01           High              27    244.5700
...
Developer#
Files in this repository#
binder
index.ipynb
Nixpkgs BinderHub example#
![]() |
|

Why Nix?#
Nix would be a great addition to reproducible data science. It is a unique package manager. Some notable features:
100% reproducible environments (pin to exact commit in repository)
both a source and binary package repository
allows customized compilation and version of every package
can run identical environment outside of docker (all linux distros + dawin)
as of now 45,000+ packages
fully declarative environments
packages: python, javascript, julia, R, haskell, perl, and many other languages (some better than others).
Assuming that you have nix
installed (compatible with all
linux distributions and darwin (Mac OS)) you can run this repository
locally (no need for binderhub). It will be identical assuming you
have pinned repositories. Nix can coexist fine with other package
managers.
This derivation installs python37, numpy, and scipy.
For a more detailed example see the detailed binderhub example costrouc/nix-binder-example
Files in this repository#
LICENSE.md
default.nix
nix-introduction.ipynb
Dockerfile environments#
Minimal Dockerfiles for Binder#
![]() |
|

Binder needs only one thing for images to work:
to be able to launch
jupyter notebookas a specified user (passed via docker build args as NB_UID/NB_USER)
What this means in practice is that the notebook package must be installed and on PATH:
RUN pip install --no-cache notebook
That’s almost everything.
The remaining piece is that the specified user must be able to start the notebook, which requires certain permissions like being able to write to the home directory.
The absolute bare minimum for this is to set HOME to /tmp so that it’s writable,
which would make the shortest, smallest Dockerfile that works on Binder:
FROM python:3.7-slim
RUN pip install --no-cache notebook
ENV HOME=/tmp
which you can try out: ![]()
However, it would be better to consume the NB_UID/NB_USER arguments and create a real user:
### create user with a home directory
ARG NB_USER
ARG NB_UID
ENV USER ${NB_USER}
ENV HOME /home/${NB_USER}

RUN adduser --disabled-password \
    --gecos "Default user" \
    --uid ${NB_UID} \
    ${NB_USER}
WORKDIR ${HOME}
From this point, you can start adding files, installing packages, etc.
Files in this repository#
Dockerfile
Using a Docker image from the Jupyter docker-stacks repository#
![]() |
|

Sometimes you just want to inherit from one of the pre-built images maintained by the Jupyter Project’s Docker Stacks, and perhaps add just an extra library or two. This example shows you how to do that - check out the Dockerfile.
Note that in this case we are using a docker image that already satisfies the criteria for use on binder, we don’t need to install notebook or anything manually.
Files in this repository#
Dockerfile
Specifying an R environment with a runtime.txt file#
Jupyter+R: ![]()
RStudio: ![]()
RShiny: ![]()
Both RStudio and IRKernel are installed by default, so you can use either the Jupyter notebook interface or the RStudio interface.
This repository also contains an example of a Shiny app.
Files in this repository#
Dockerfile
bus-dashboard
index.ipynb
install.R